04
Spring
2008
Open House Prototype Plan
Posted on: Thursday, January 31, 2008
Team Name:
Team Octobox
Team URL:
http://www.octobox.org/final
Team Members:
Kurtis Beard
Derek Pante
Manuel Pineault
Andrew Thong
Katrina Chua
Sammy Jayetileke
Brian Quan
Prototype Plan Fall’07 Midterm Walkthrough:
1) Project Overview
2) Scenario One: Physical Prototype
3) Journey Framework: Physical Prototype
4) Demonstration: Physical Prototype
5) Scenario Two: Widget Prototype
6) Journey Framework: Widget Prototype
7) Demonstration: Widget Prototype
Prototype Plan Open House:
1) Built widget, no connection to physical prototype
2) Working physical prototype (water and light systems)
3) Brochure
4) Poster in the background ![]()
Equipment Requirements:
1) Table
2) Projector
3) Power bar & outlet
4) Arduino
5) Chairs [6]
Space Needs:
Enough space for our physical prototype, table, and projector screen.
Space Allocation:
We’d like to be outside!
03
Spring
2008
Cognitive Walkthrough
Posted on: Thursday, January 24, 2008
Description of the Prototype
The Sustain-a-Stack is a mini indoor greenhouse used for growing herbs, vegetables and other small plants. Ideally to be located in a living room or a kitchen, this product is targeted for people with interests in the organic food market or in growing their own plants at home but don’t have the space or time to do so.
The physical prototype will include a watering system and LED lights in a box to sustain the plant. Other sensors that will pick up temperature, humidity and water levels will be added later on in the process. The levels that the sensor will detect will transmit to an interface widget on a computer through the Arduino microcomputer. The widget will allow the user to monitor the plant by checking up on its status, viewing the last watering date, water the plant and turn the lights on and off.
Although the widget provides efficient feedback to the user, it will only simulate the desired action since there is still no communication between the interface and the physical box as of now.
Representative Task
At home: The user would approach the Sustain-a-Stack physically and check on its status. Based on how often the plant needs to be watered, the user would push the watering button and the system would spray water on the plant. The lighting system will automatically turn on and off in a cycle but if the user wishes, the lights could also be controlled manually by pressing the light toggle button.
At work/elsewhere: The user would check on the status of the plant by accessing the Sustain-a-Stack widget on his computer. Then he can check the temperature, humidity and water levels. Also shown are the days since the plant has last been watered which then prompts the user to click on the water button on the widget interface. Lights can also be manipulated through this widget.
Actions Needed
Pre-planting -performed everytime user is to plant something new
- adding soil to fill the bottom of the Sustain-a-Stack
- planting seedlings within the soil
- filling water reserve to enable watering through the press of a button or through the widget
Everyday
- watering - box/widget
- turn lighting on and off - box/widget/automated
- monitor status of the plant in person or through the detected levels on the widget interface - box/widget
Once in a while
- trimming the plant
- reaping the harvest of the produce or herbs grown to be consumed
Users + Experience
Our target audience will be people who are interested in the organic food market specifically people who want to grow their own organic food. Typically, our users will be busy, having little time to take tend to their plant. They will have familiarity with using computers to be able the access the widget. They should also have an idea of basic plant care. The user will be able to take care their plants indoors ideally in their living room or kitchen. Having the Sustain-a-Stack is meant to motivate people to grow their own food, promote green living and display the progress they’ve made with their plant in their homes.
Recent Events
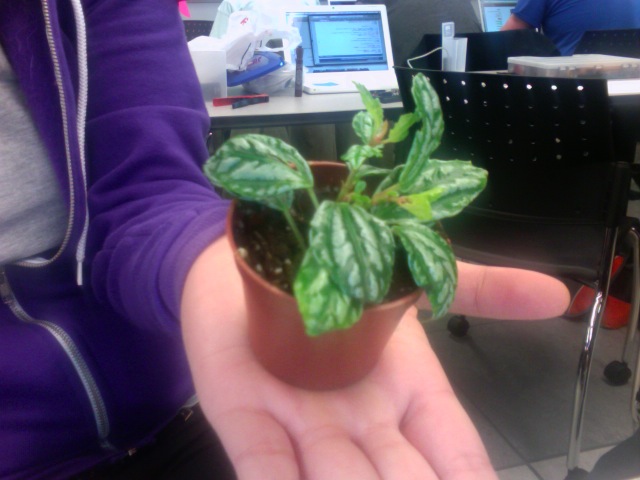
Pete, our original prototype plant, died over the Christmas break. RIP. So we got Petunia (Pete-2-nia) ![]()
We also had to design a poster for the Open House coming up. Andrew will make a better, digital version of it but this is what we have for now. We plan to include a description of the product, our target audience, mission statement and a bit of the processes we went through.
02
Spring
2008
Prototype Feasibility and Plans
Posted on: Thursday, January 17, 2008
PROTOTYPE OPTION
After considering the range of options, we have decided to produce a partially operational appearance prototype of our Sustain-a-Stack. This best suits the feasibility of our proposed product because we feel confident that we can build a hardware prototype of our box, which will look very close to what we want as our final physical form, with some of the functionality partially working. For instance, we will attempt to have a partially working version of our watering system for this prototype, as well as our humidity sensor; but, we know that it will be a difficult process to get these functions working, so we will be content to have these moderately working.
FEASIBILITY STUDY
A. Software Issues
1. Software involved: Flash
2. Programming the Arduino board to sync with Flash is a technical issue that we will need to overcome, as only a few of our members have done this before. Also, programming the calendar and the humidity-sensing functions of the widget will be other programming issues that we’ll need to deal with.
3. We believe that we can deal with these issues as we have two members who have had prior experience working with Flash and Arduino together (Kiks and Brian), as well as an expert ActionScript programmer (Manuel); the other remaining members of the team also have working knowledge of Flash.
4. Our primary option is to use Flash and Arduino together. But, as a backup, we are willing to try other options, such as Max/MSP and Arduino, or Max/MSP and the Teleo kit (most of our members have experience with Teleo).
5. All the members of our team have access to both Flash and Arduino-related applications. Any “special” equipment, such as the Arduino board, can be borrowed from the library. Alternatively, Andrew is planning on purchasing an Arduino board himself, so we will most likely be using his, with the library’s as a backup (and/or for testing purposes).
B. Hardware Issues
Our main focus is to have the hardware detect information to send to the Arduino board which will take a bit of trial and error. Enough time is alloted for this task and if we have extra time, we can shift our focus to having the buttons and the watering work.
1. Hardware involved:
- Arduino - library (then later on, buy one for ourselves)
- sensors - potentiometer, temperature sensor, humidity sensor (?)
- LED’s
- wires
- wood
- housing (start of with cheap plastic for the prototype)
- buttons (to control the light and water distribution)
- soil
- plants - start off small (Pete II)
2. Getting multiple sensors to interact with the Arduino board will be one of the major technical issues that we will need to overcome. Making sure that the water and soil from the plant’s environment do not disrupt the electronic hardware components (and vice versa) will be another issue. Finally, getting the buttons to work correctly (e.g. releasing water whenever the water button is pushed) is another issue to deal with.
3. Though we’ve had prior experience with Arduino, we’ve never tried connecting more than one sensor at a time, which will require more research and experimenting in this aspect. Some of our members have dealt with electronics before so we’re fairly confident with solving most of our hardware component concerns.
4. In the case that a specific sensor does not function as we intend it to, there are other sensors out there that we can use as substitutes. Our options for the hardware will depend on the availability of supplies in the stores that we will be going to.
5. All the hardware that we will be needing are easily accessible at any hardware store. We will be doing most of our purchases at Lee’s on Main Street and the other electronics store on the same block. The whole group has agreed to pitch in to pay for the materials that we will be needing for this semester.
PLAN FOR CREATING THE PROTOTYPE
1. We have roughly 4 weeks to prototype before the presentation and user testing.
- First Cycle: Rough construction of the form of our box, and a low-fidelity interface of our widget;
- Testing: Running our tests with the same, or at least similar, types of people that we interviewed in the first semester, as they represent our actual user group.
- Second Cycle: We’ll take the feedback from the testing and put it towards our “Final” prototype, which will hopefully be working…
2. Most of the construction will be done on Saturdays and Monday nights. We will also want to bring whatever we have ready to class to get instructor feedback, ask questions and to continue working on it.
3. We will be taking care of the funds that we need for the project. Outside dependencies will just be help and advice from instructors. The amount of supplies and resources that we will be needing is undefined as it will continue to change through our trial and error prototyping process but we have already listed down what we need for the initial construction session this Saturday.
4. Roles of members:
- Hardware-wise, Andrew, Derek, Kiks and Kurtis will be dealing with wiring and attaching the sensors, buttons, etc. to the constructed physical prototype. Brian will be in charge of getting these components to transmit the necessary input to the software side of the product.
- Software-wise, we will be assigning Manuel to do the Flash ActionScript programming, working closely with Kiks, who will be handling the Flash-to-Arduino programming components. Derek and Brian will be assisting Kiks and Manuel wherever they can.Sammy will continue to manage the group, make sure we stick to the timeline and do the shopping for materials needed.
5. We have back-ups for most of the aspects of the prototyping phase. The alternatives for the technical software and hardware components are discussed in our feasibility study above.
Whew! That was a long post. We’ll try keep it short and sweet next time ![]()
01
Spring
2008
The second half begins! Spring 2008
Posted on: Saturday, January 12, 2008
We’re back! Happy New Year everyone!

So for this semester, we actually have to MAKE this the Sustain-a-Stack. We put together a list of materials we need for a crude prototype that we plan to construct next weekend.
- Arduino - library (then later on, buy one for ourselves)
- sensors - potentiometer, temperature sensor, humidity sensor (?)
- LED’s
- wires
- wood
- housing (start of with cheap plastic)
- buttons
- soil
- plants - start off small (Pete II)
This initial list is just for a simple prototype that would help us sort out the form of the product and if we can actually get the technical side to work so we’re starting with cheapest materials we can find. We can spend more money later on.
Here is our Timeline for the next 13 weeks of epic work!
IAT 404 – Gantt Chart: Timeline

View our graphical gantt chart timeline.
WEEK 1: January 6th - January 12th – Team Organization
- Gantt Chart and Team Management/Structure established
- New roles established
- Materials List compiled
- Team Contract: Roles altered to accommodate new class requirements
WEEK 2: January 13th – January 19th - Material Assemblage
- PHASE #1 Widget Design
- PHASE #1 Physical Prototype Construction
- Address storage issues
- Material Assemblage
- Sensor Research
WEEK 3: January 20th – January 26th - Prototype Design
- PHASE #1 Widget Design Completed (January 21st)
- PHASE #1 Physical Prototype Construction
- PHASE #1 Widget Development
- User Testing Recruitment (ideally, the same participants which we used for the last semester)
- Usability Testing Design
- Sensor Research
WEEK 4: January 27th – February 2nd - Usability Design
- PHASE #1 Widget Development Completed (January 28th)
- PHASE #1 Physical Prototype Construction Completed (January 28th)
- Usability Testing
- Sensor Research
WEEK 5: February 3rd –February 9th - Usability Testing
- Re-document Usability Testing Results (in a presentation-friendly form)
- Midterm Presentation Outline
- Sensor Research
WEEK 6: February 10th – February 16th – Usability Analysis
- Midterm Presentation Design
- Analyzing User Testing Results
- Evaluate Feedback and Classify as Necessary/Unnecessary Changes
- Sensor Research
WEEK 7: February 17th – February 23rd - Presentation
- Midterm Presentation
- Re-assign roles for Iterative Process (dependent on user feedback)
- Sensor Research
WEEK 8: February 24th – March 1st – Prototype Re-Design
- PHASE #2: Physical Prototype Construction
- PHASE #2: Widget Design
- Sensor Research
WEEK 9: March 2nd – March 8th Prototype Re-Design
- PHASE #2: Physical Prototype Construction
- PHASE #2: Widget Design Completed (March 3rd)
WEEK 10: March 9th – March 15th – Prototype Refinement
- PHASE #2: Physical Prototype Construction Completed (March 10th)
- PHASE #2: Widget Design Development
- Marketing Planning
WEEK 11: March 16th – March 22nd – Marketing Design
- Marketing Design + Execution
- Practice Run Through of Presentation
- PHASE #2: Widget Design Development Completed (March 17th)
WEEK 12: March 23rd – March 29th - Troubleshooting
- Final Presentation Design
- Marketing Execution
WEEK 13: March 30th – April 5th - Presentation
- Final Presentation to Class
As for the team contract, whatever we agreed on last semester still applies. End of story.